Creating Custom User Role Centers
Posted by Author, Curator, Visually Impared Squirrel Literacy Advocate & Dynamics AX Technical Solution Professional (TSP) at Microsoft on
Dynamics AX comes pre-packaged with over 40 standard role centers for a lot of the normal user types that you would expect to see within an organization – CFO, Salesperson, AP Clerk, etc. But what if you have unique roles within your organization that don’t fit the standard roles. Wouldn’t it be nice to create your own?
In the following walk through we will show you how to do just that.
- The first step in the process is to create a new Role Center Page Template. To do that, open up the Enterprise Portal, and from the Site Actions menu, click on the View All Site Content menu item.
- This will show you all of the site content. All of the Role Center Templates are stored in the Enterprise Portal document library. Click on that to open up the library.
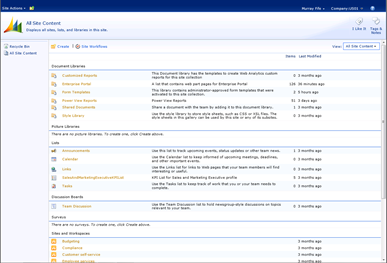
- If you browse through the files there you will be able to find all of the Role Centers. They are easy to spot and all begin with RoleCenter. From the Documents tab on the ribbon bar click on the New Document menu item to create a new template.

- Give your Role Center Template a name. You can change the layout of the template, but it is best just to use the default.

- After the new Role Center Template is created, you will be taken into the edit mode for the page. If you click on the Add a Web Part link on any of the columns you will be taken into the web part catalog, where you can select any of the standard web parts delivered with SharePoint and also Dynamics AX.
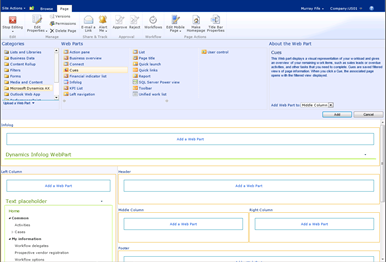
- You can add Web Parts until you are satisfied with the template. Then click the Stop Editing button on the ribbon bar. This will take you back to the view mode and you are done with the template creation.
- The next step is to create a menu item for the Role Center within AOT. To do this you can go directly into the AOT tree and inter the Web – Web Menu Items – URLs node. Although a better thing to do though is to create a new development project for the menu item. So from AOT create a new project and give it a more appropriate name.
- Within the project, add a new URL object from the Web group.
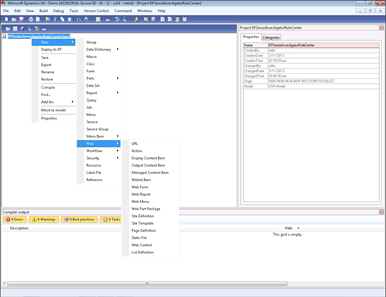
- Now we need to configure the URL menu. Give the object a Name, Label, and Help Text. Within the URL field, type in the relative path for the Role Center that you created. It will probably be:
/Enterprise Portal/RoleCenterName.aspx
Also, make sure that you set the HomePage field to Yes.
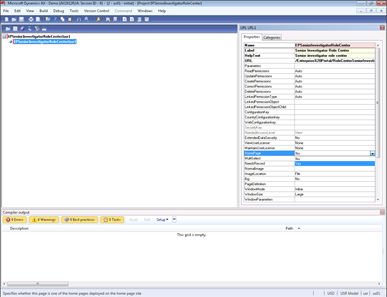
- Then save your project
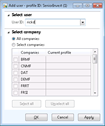
- Now we need to create a new User Profile. From the System Administration menu click on the User profile menu item in the Common area in the Users group. This will open up a list of all the User profiles in the system. Click on the New button to create a new record.
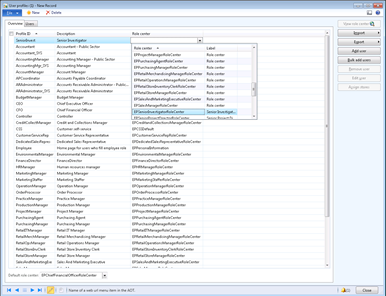
- You can give your new profile a name and from the drop down box on the Role Center field, you should be able to find the new Role Center menu that you just created. If you click on the Users tab, you will be able to see the users that are assigned to the roles. In this case it will be blank. Click on the Add user button. Now you can select the users that you want to assign to the role.
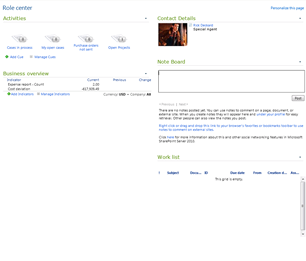
The next time your user logs in, they will be assigned the new Role Center template that you created. They will then be able to personalize it without having to add all of the web parts and change the layout themselves.
Very cool.
Share this post
- 0 comment
- Tags: Dynamics AX
0 comment