Configuring Demand Forecasting
Posted by Author, Curator, Visually Impared Squirrel Literacy Advocate & Dynamics AX Technical Solution Professional (TSP) at Microsoft on
Dynamics AX has always allowed you to enter in Demand Forecasts against products and customers, but with the R3 release of 2012, a new feature was added that allows your to have the system create your statistical forecasts based on the history in the system and then allow you to adjust the forecasts through Excel before automatically uploading them back into the demand forecast tables. Although there still may be cases where you want to use a companion product to create more elaborate forecasts, for most people, this is more than enough, and it’s included in the product at no extra cost.
You don’t have to resort to mysticism and guess work anymore when it comes to forecasting.
How To Do It…
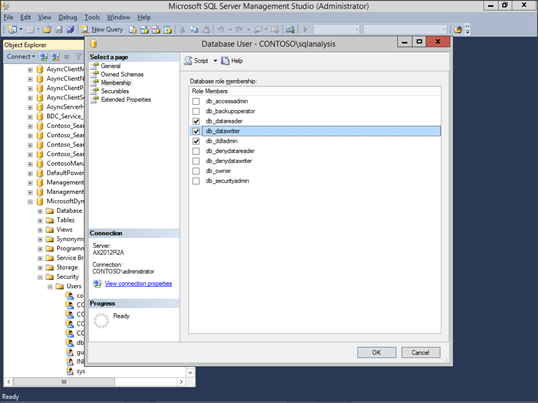
Before you start, there are a few things that you will want to make sure that you have configured. First, we need to make sure that our analysis services user that is going to be running the forecast generation has access to the SQL database. To do this open up SQL Enterprise Manager, expand the Databases group, find your Dynamics AX database and then open up the Users folder within the Security group.

Right mouse click on the sqlanalysis user and select the Properties menu item.

Make sure that the db_datawriter and the db_ddladmin options are enabled for the user.
After you have done that, close out of SQL Enterprise Manager.
Next we want to make sure that we have a Forecast Model to post our forecast results to. To do this, click on the Forecast Models menu item within the Forecast folder of the Setup group within the Inventory Management area page.

If you do not have a forecast, then click on the New button in the menu bar to create a new record and then give your forecast a Model and a Name. You don’t have to configure any other options here.

When you have done that, click on the Close button to exit from the form.
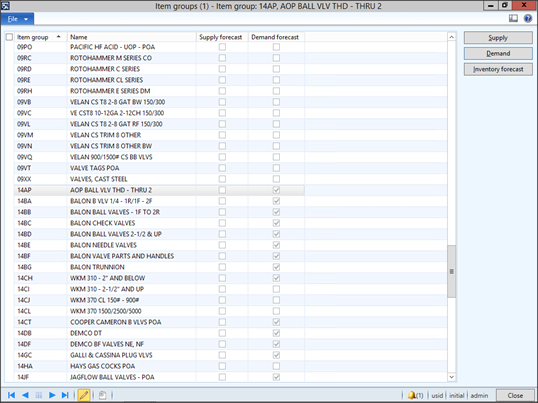
Also, to make the forecast a little more usable, it’s a good idea to segregate out your products into different item allocation groups. To do this, click on the Item Allocation Keys menu item within the Forecasts folder of the Setup group of the Inventory Management area page.

When the Item Allocation Keys maintenance form is displayed, add all of the different item groups that you want to forecast by. Then for each of the Allocation Keys, click on the Assign Items button in the menu bar.
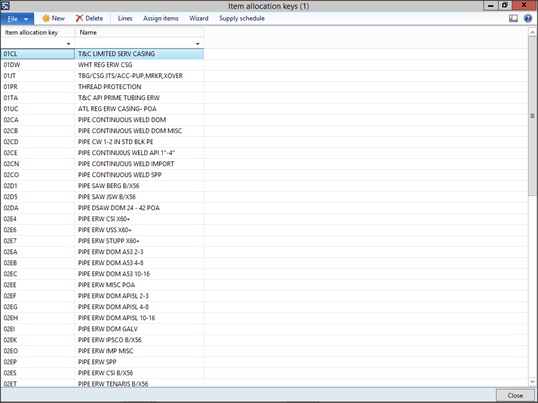
This will open up the Assign Multiple Items maintenance form where you can assign the items to your group.

After you have set up all of the Allocation Groups click on the Close button to exit from the form.
Now we need to set up the forecasting parameters. To do this click on the Demand Forecasting Parameters within the Demand Forecasting folder of the Setup group within the Master Planning area page.
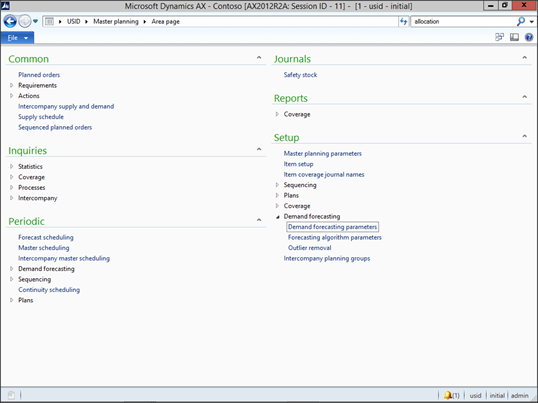
Select the items that you want to use for the forecast history sources, and then add a parameter for Forecast Method Used.

Also, switch to the Forecast Dimensions page, and add all of the dimensions that you want to slice and dice your forecasts by.

When you have done that, click on the Close button to exit from the form.
If you want to modify any of the forecasting algorithm flags, then click on the Forecasting Algorithm Parameters menu item within the Demand Forecasting folder of the Setup group of the Master Planning area page.

Here you can tweak the default parameters, but I prefer to leave these alone and just close out of the form.

How It Works…
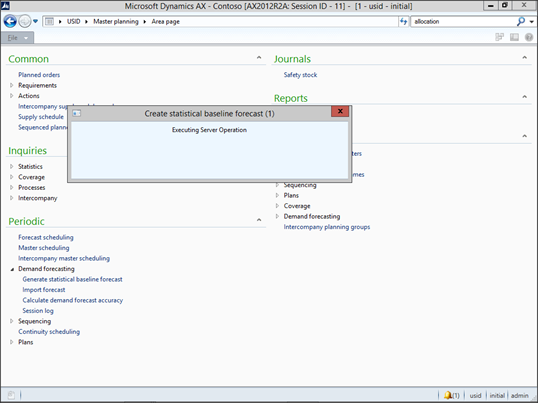
Now we have everything configured and we can start generating our forecasts. To do this, click on the Generate Statistical Baseline Forecast menu item within the Demand Scheduling folder of the Periodic group within the Master Planning area page.

When the Create Statistical Baseline Forecast dialog box is displayed, click on the Show More Fields button in the bottom left of the form to see more details.
Select the Start and End date to use for the history data, and also select a Start date for the baseline forecast. If you want to only forecast a select number of items, then you can modify the selection parameters to filter to specific Item Allocation Keys.
Finally select the Forecast Bucket and the number of periods that you want to forecast and click on the OK button.

Dynamics AX will now go and generate the forecast for you… it may take a minute or two based on the number of periods you are forecasting and also the number of items you are forecasting.
If everything is configured correctly you will receive an Infolog with a message that the forecast has been created and that there is a spreadsheet that is waiting for you. If you select the second message, then you will be able to click on the Open Excel File button.

When the spreadsheet opens up you will see all of your item groups have been forecasted for you.

Clicking on the Pivot Table will also show you all of the pivot table fields that are available for your to slice and dice your forecasts through.

If you click on the Product Name dimension, it will add it to the pivot table and you will see all of the forecasts that make up the item group forecast.

Or you can add the Released Product dimension, so that you have a little more real estate to work with.
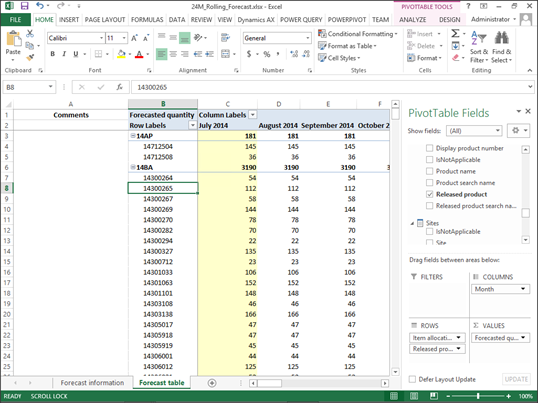
Now you can start adding your own secret sauce to the forecast by adjusting the individual product forecast buckets which will then roll up to the allocate groups forecast.

You can also adjust all of the product in aggregate by changing the forecast quantity for the parent group and it will update the child nodes by prorating based on the old values.

When you have finished making your adjustments, click on the OLAP Tools button within the Calculations group of the Analyze ribbon bar, select the What-If Analysis menu item and then click on the Publish Changes button.

Now we want to import the forecasts back into Dynamics AX. To do this, click on the Import Forecast menu item within the Demand Forecasting folder of the Periodic group of the Master Planning area page.

When the Import Forecast dialog box is displayed, select the Forecast Model that you want to import the forecasts into and then click on the OK button.

Dynamics AX will now go to the forecasting cube and start loading the forecasts… it may take a minute or two depending on how much you are forecasting.

If everything works, then you will get a dialog box telling you how many adjustments were made to the forecast and you can close out of the form.

To view your forecasts, click on the Item Groups menu item within the Entry sub folder of the Forecast folder within the Periodic group of the Inventory Management area page.

Find the Item Group that you want to see your forecast values for and then click on the Demand button on the right hand side of the form.
That will drill you down into the items forecasts and you will see the updated results from the forecast.

How cool is that?

Share this post
- 0 comment
- Tags: Dynamics AX
0 comment